이번 공부 내용은 안드로이드의 데이터를 저장하는 방법 중 하나인 SharedPreferences를 알아보겠다.
# SharedPreferences란?
개발을 하다 보면 데이터를 저장하여 관리해야 할 일이 생긴다. 물론 데이터 양이 많으면 서버 DB에 저장하면 되겠지만 간단한 데이터들을 저장하기 위해 DB를 사용해야 하는 것은 시간낭비뿐만 아니라 공간 낭비이다.
그래서 로그인 여부, 간단한 설정 값 등 저장하고 관리하기 위해 SharedPreferences를 사용한다.
# SharedPreferences 특징
■ Map 구조인 Key-Value 형태로 저장한다.
■ 애플리케이션에 파일 형태로 데이터를 저장한다.
■ 애플리케이션이 삭제되기 전까지 내부에 보관이 된다.
저장되는 파일의 위치는 data/data/(package_name)/shared_prefs/SharedPreference이다.
# SharedPreferences MODE 종류
■ MODE_PRIVATE : 생성한 애플리케이션에서만 사용 가능
■ MODE_WORLD_READABLE : 외부 App에서 사용 가능, 읽기만 가능
■ MODE_WORLD_WRITEABLE : 외부 App에서 사용 가능, 읽기/쓰기 가능
# 사용법
## 저장하기
// put을 사용해 값 저장하기
val pref = getSharedPreferences("test",MODE_PRIVATE)
val editor = pref.edit()
editor.putString("test1", "테스트 1 입니다.") // String값 저장
editor.putString("test2",true) // Boolean값 저장
editor.putInt("test3",3333) // Tnt값 저장

editor.apply() // 데이터 저장
데이터 저장은 SharedPreferences.edit() 선언 후 putString, putBoolean, putInt 등으로 put다음 자료형을 입력해 저장할 수 있다.
## 읽어오기
// get을 사용해 값 읽어오기
val pref = getSharedPreferences("test",MODE_PRIVATE)
val value1 = pref.getString("test1","디폴트 값 입니다.")
val value2 = pref.getBoolean("test2",true)
val value3 = pref.getInt("test3",1)

println("value1의 값 $value1")
println("value2의 값 $value2")
println("value3의 값 $value3")


// 출력
// value1의 값 테스트 1 입니다.
// value2의 true
// value3의 3333
데이터 읽기는 getString, getBoolean, getInt 등으로 get다음 자료형을 입력해 저장한 자료를 읽어 올 수 있다.
get은 get(key, DEFAULT_VALUE)으로 작성한다.
## 삭제하기
// get을 사용해 값 읽어오기
val pref = getSharedPreferences("test",MODE_PRIVATE)
val editor = pref.edit()

editor.remove("test1") // key값을 적어주면 된다
// 전체 삭제는 editor.clear() 이다.
editor.apply() // 적용
데이터 삭제는 저장과 마찬가지로 SharedPreferences.edit() 선언 후 remove("키 값")을 적어주고 적용해주면 된다.
# 예제를 통한 사용 법

우선 처음 접속해서 String데이터가 저장이 안 되어 있는 모습이다.
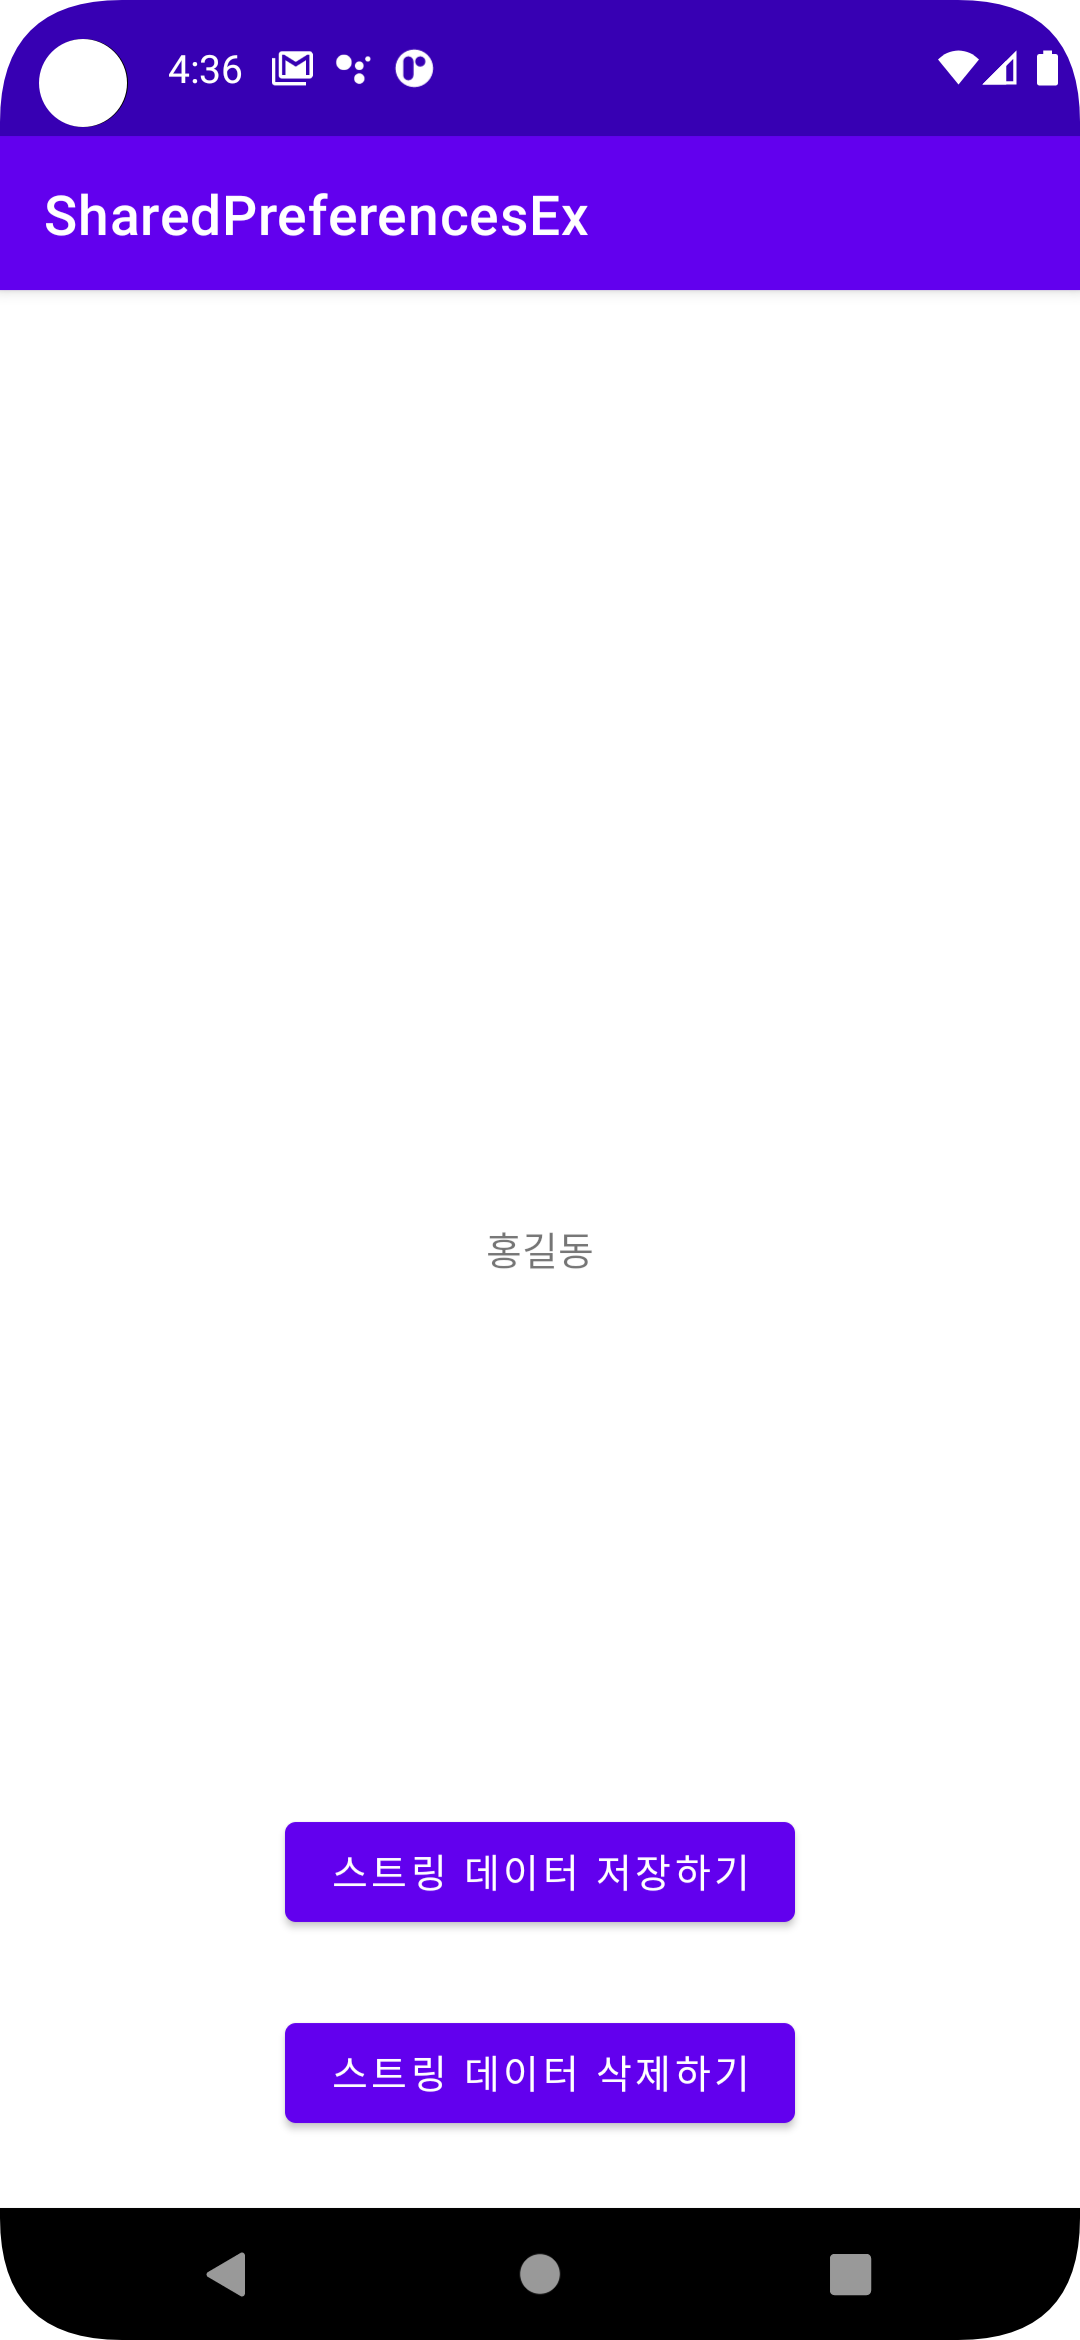
그다음 String데이터 저장하기 버튼을 누르면 아래와 같이 데이터가 저장돼서 textView에 나오는 모습을 볼 수 있다.

이제 여기서 데이터 삭제하기를 누르면 삭제가 되면서 다시 textView에 "값이 없습니다."가 표시가 된다.
# activity_main.xml
<?xml version="1.0" encoding="utf-8"?>
<androidx.constraintlayout.widget.ConstraintLayout xmlns:android="http://schemas.android.com/apk/res/android"
    xmlns:app="http://schemas.android.com/apk/res-auto"
    xmlns:tools="http://schemas.android.com/tools"
    android:layout_width="match_parent"
    android:layout_height="match_parent"
    tools:context=".MainActivity">

    <TextView
        android:id="@+id/textView1"
        android:layout_width="wrap_content"
        android:layout_height="wrap_content"
        android:text="값이 없습니다."
        app:layout_constraintBottom_toBottomOf="parent"
        app:layout_constraintLeft_toLeftOf="parent"
        app:layout_constraintRight_toRightOf="parent"
        app:layout_constraintTop_toTopOf="parent" />

    <Button
        android:id="@+id/dtnSave"
        android:layout_width="wrap_content"
        android:layout_height="wrap_content"
        android:text="스트링 데이터 저장하기"
        android:layout_marginBottom="25dp"
        app:layout_constraintBottom_toTopOf="@+id/dtnDel"
        app:layout_constraintEnd_toEndOf="parent"
        app:layout_constraintStart_toStartOf="parent" />

    <Button
        android:id="@+id/dtnDel"
        android:layout_width="wrap_content"
        android:layout_height="wrap_content"
        android:text="스트링 데이터 삭제하기"
        android:layout_marginBottom="25dp"
        app:layout_constraintBottom_toBottomOf="parent"
        app:layout_constraintEnd_toEndOf="parent"
        app:layout_constraintStart_toStartOf="parent" />

</androidx.constraintlayout.widget.ConstraintLayout>
간단하게 버튼 2개와 텍스트뷰 한 개로 구성이 되어 있다.
# MainActivity.kt
package com.example.sharedpreferencesex

import android.content.SharedPreferences
import android.os.Bundle
import androidx.appcompat.app.AppCompatActivity
import com.example.sharedpreferencesex.databinding.ActivityMainBinding

class MainActivity : AppCompatActivity() {
    private lateinit var binding: ActivityMainBinding
    private var name : String? = null

    override fun onCreate(savedInstanceState: Bundle?) {
        super.onCreate(savedInstanceState)
        binding = ActivityMainBinding.inflate(layoutInflater)
        setContentView(binding.root)

        val pref: SharedPreferences = getSharedPreferences("userName", MODE_PRIVATE)
        val editor = pref.edit()
        binding.dtnSave.setOnClickListener {
            editor.putString("이름1","홍길동")
            editor.apply()
        }

        binding.dtnDel.setOnClickListener {
            editor.remove("이름1")
            editor.apply()
        }

        name = pref.getString("이름1","값이 없습니다")

        binding.textView1.text = name
    }

}
깃 허브 링크
https://github.com/JiSeokYeom/SharedPreferencesEx.git
GitHub - JiSeokYeom/SharedPreferencesEx
Contribute to JiSeokYeom/SharedPreferencesEx development by creating an account on GitHub.
github.com
'안드로이드 공부 노트' 카테고리의 다른 글
| [Android - Glide] 안드로이드 이미지 로드 라이브러리 Glide 사용법 - Kotlin (0) | 2022.10.09 |
|---|---|
| [Android] 안드로이드 registerForActivityResult()란?(startActivityForResult derpecated 해결 방법) (0) | 2022.05.29 |
| [Android] 안드로이드 뷰 페이저2(ViewPager2)+탭 레이아웃(TabLayout) 예제를 통한 사용법 (1) | 2022.03.13 |
| [Android]안드로이드 매니페스트(Manifest)란? - 개념,역할 (0) | 2022.03.10 |
| Android Jetpack - 5편 ViewModel + DataBinding + LiveData 통합 사용법 (2) | 2022.02.24 |


